AirLinc Tutorial
Setup
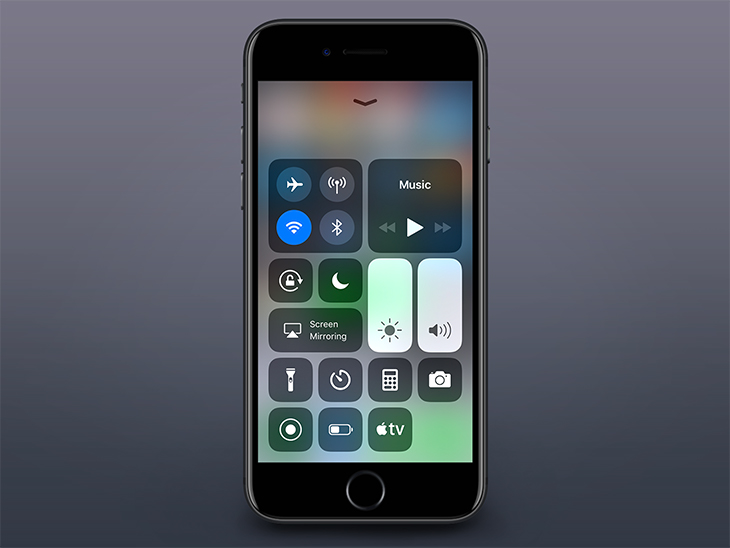
Enable ‘do not disturb’ mode to prevent calls or texts interfering with your recordings. To access ‘do not disturb’ mode, swipe from the bottom of your screen to see the control centre and press the icon that looks like an airplane. Do this on all devices you will be using in the session.
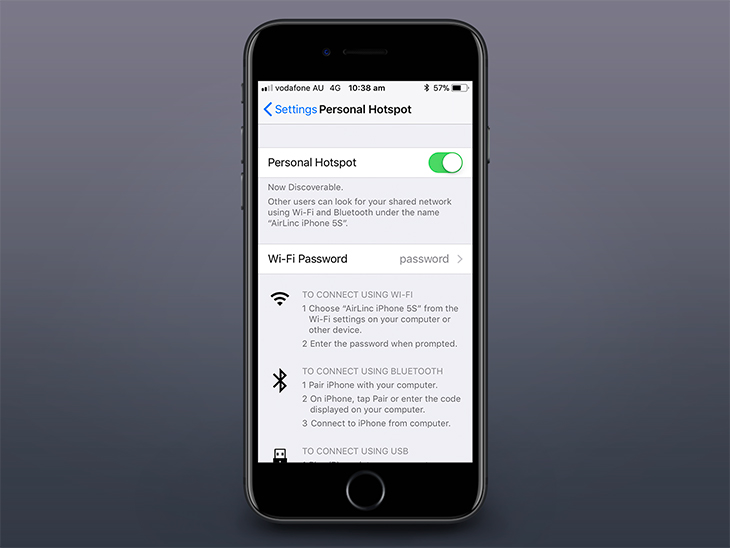
Connect your devices to the same Wi-Fi router OR have them share a personal hotspot.
Starting a Session
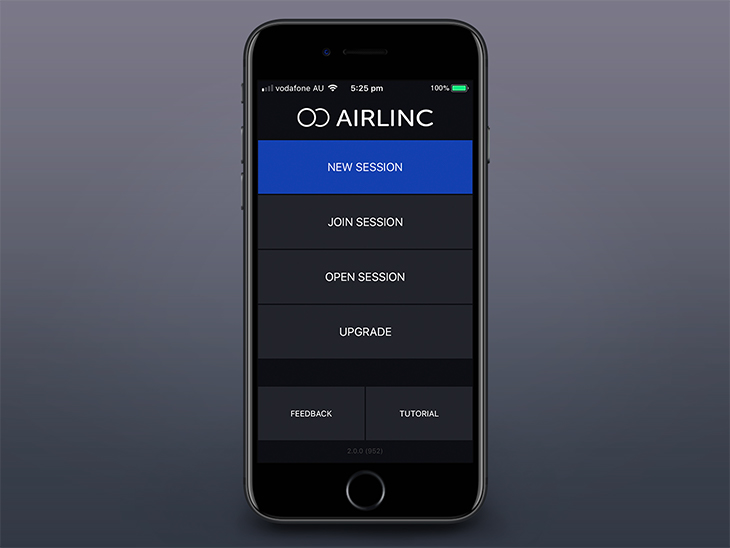
Open AirLinc and select ‘new session’ then enter a name for your session.
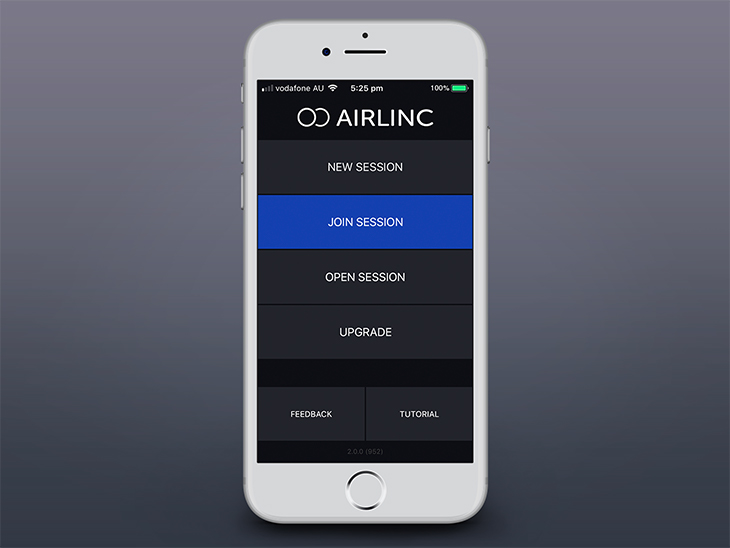
To add more devices to your session, select ‘join session’ on these devices, then select the session you created in the live sessions list. If you cannot see a live session you may not be connected to the same network on both devices.
Session Controls
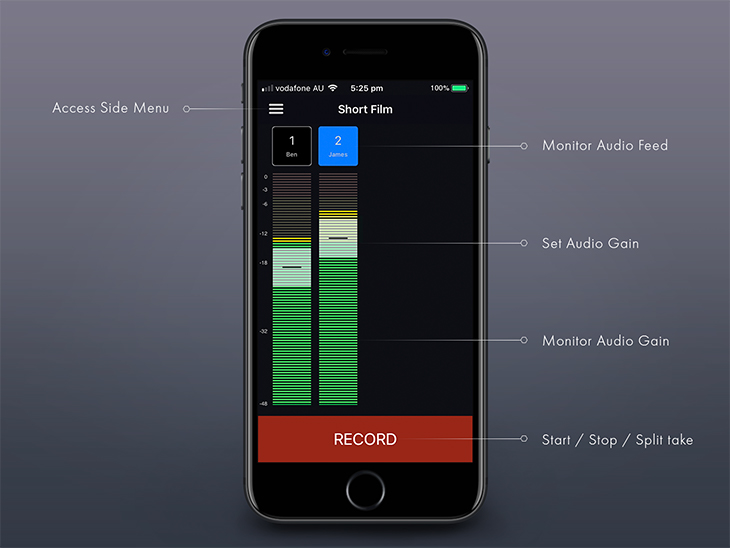
Adjust Audio Gain
Each device will transmit audio gain readings that can be adjusted with the gain slider on the receiver device.
Monitor your Audio.
You can also audibly monitor each device individually by tapping the channel number.
Start / Stop Recording
Tap ‘record’ to trigger recording on each device in your session. Audio records at 48 khz in a lossless wav format. Tapping the ‘record’ button again will allow you to stop recording or spit the take which seamlessly begins recording to a new take.
Access Side Menu
To access more options, open the side menu by tapping the menu icon in the top left of the screen.
Side Menu
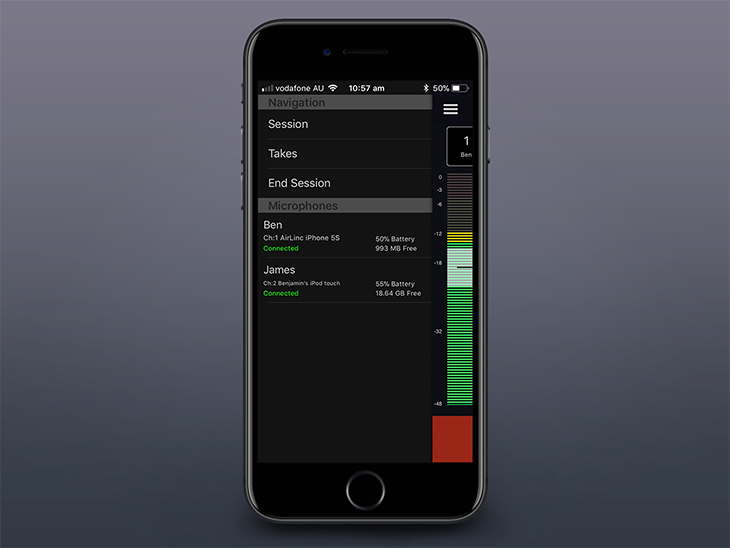
Using the side menu you can review & share your audio files, manage your connected devices, or end the recording session.
Takes Menu
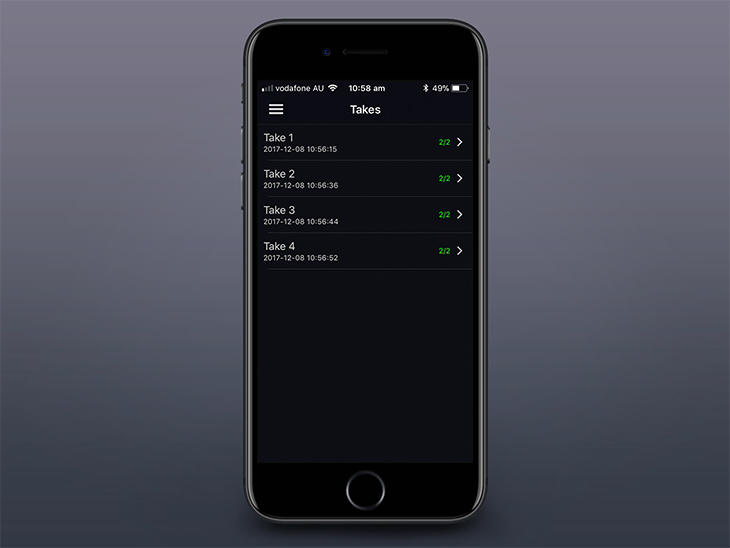
Select the ‘takes’ menu within the side menu to review your recordings.
The recordings from each take automatically sync to your master device and are stored in take based folders. You can tell how many audio channels you recorded vs how many have synced to your device by looking at the sync status.
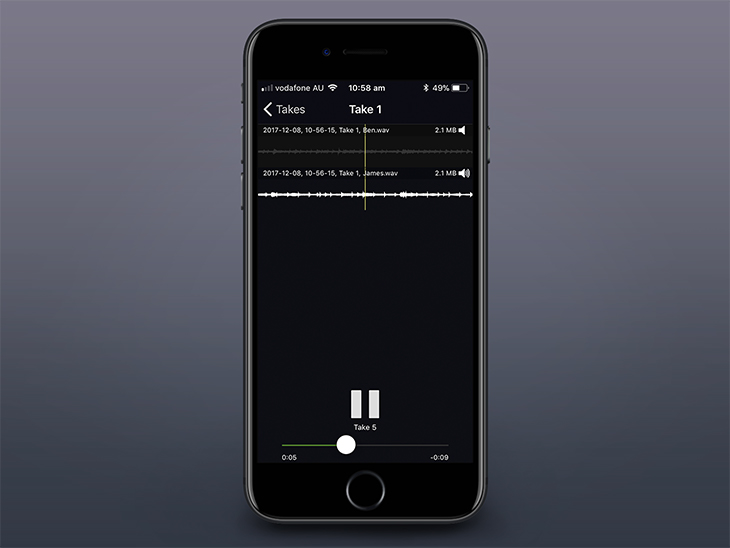
The filename of each recording contains the date and time the file was recorded as well as the name of the microphone device. This should assist in file management and post-syncing.
Selecting a take allows you to playback the audio files it contains. Tapping an audio track will mute / unmute it.
Microphones Menu
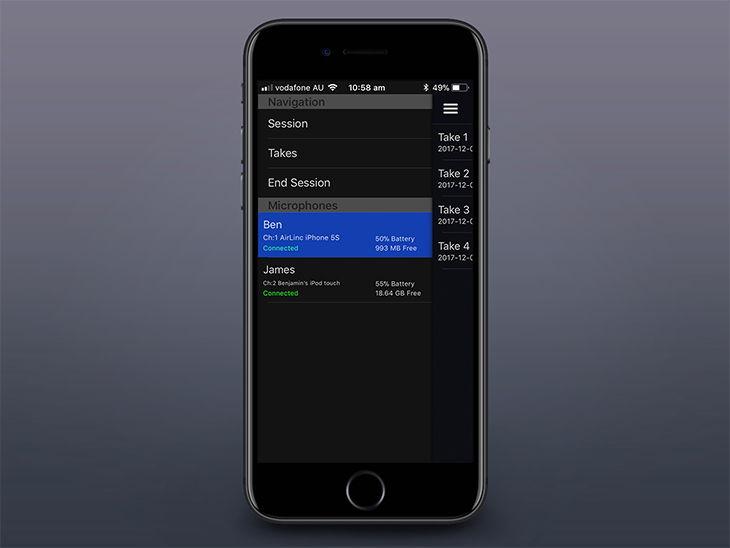
Your connected devices are listed under the ‘microphones’ section in the side menu. Here you can see a snapshot of each device's connection status, battery and storage status and device name. Tap on a device to access extra options.
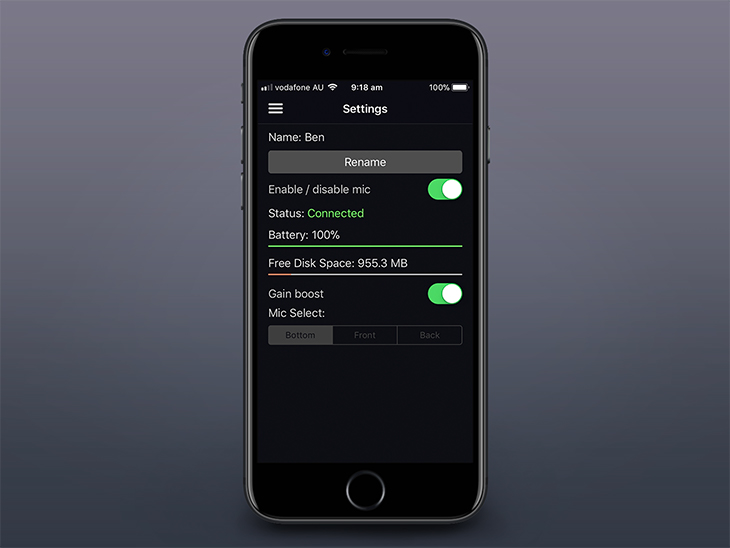
Rename Device
Here you can rename your device so it’s easier to identify and manage your audio tracks. To help with file management, the name will also be recorded in the audio file name that device records.
Enable / Disable Mic
Toggling the ‘enable disable mic’ switch will allow you to put that mic on standby, meaning it will no longer be visible in your session and will not record audio until enabled again. You can also quickly reveal a switch to enable / disable a mic by swiping left on the microphone in the side menu.
Connection Status
*Connected (device is connected to your network and your session)
*Disabled (Device is connected to your network but you have disabled it from participating in the session)
*Disconnected (the device has either left the session or is no longer connected to your wifi network / personal hotspot)
Gain Boost
Toggling the gain boost switch to the off position will disable any iOS audio processing, resulting in a slightly cleaner audio file while sacrificing some signal strength.
Mic Mode
The mic mode will allow you to select which of the iPhone’s internal microphones you prefer to record with. For best results we recommend plugging in an external microphone.
Ending a Session
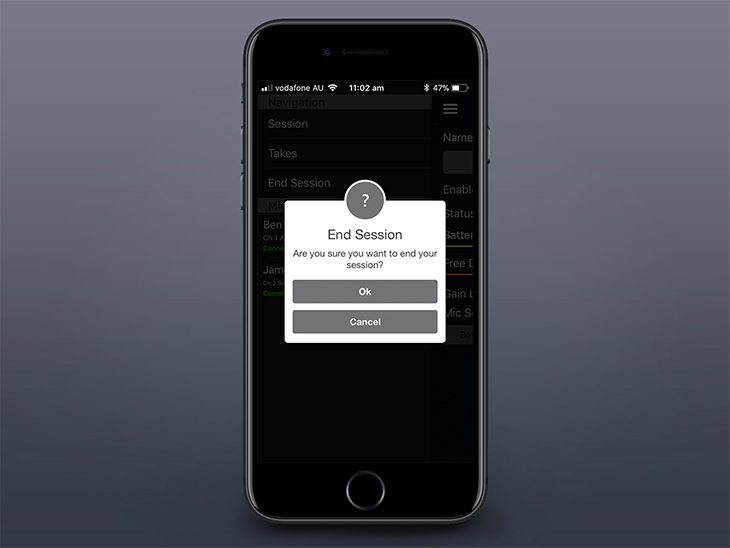
To end a session tap ‘end session’ in the side menu and confirm.
Reviewing and Sharing Files
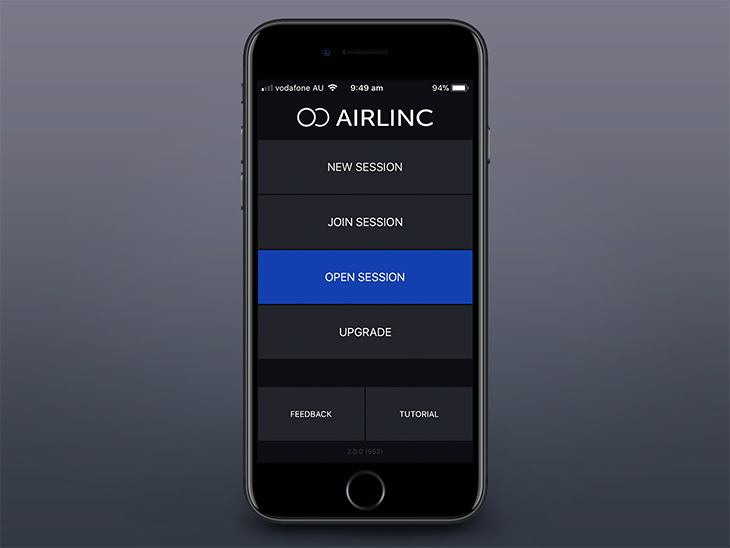
‘Open session’ lets you browse files from your past recording sessions.
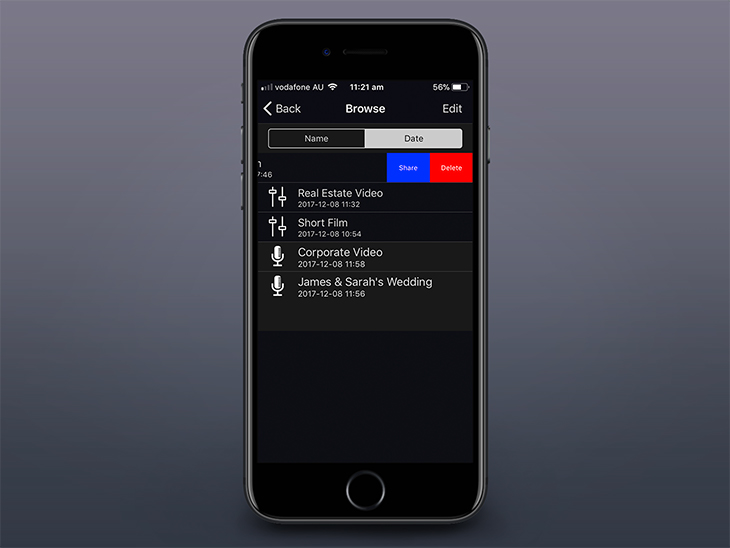
The icon to the right of the session name indicates if your device was the host or a microphone in the session.
You can easily share a file, a take or even an entire session by swiping left on the name of the file, take or session and selecting share. A range of sharing options are available.
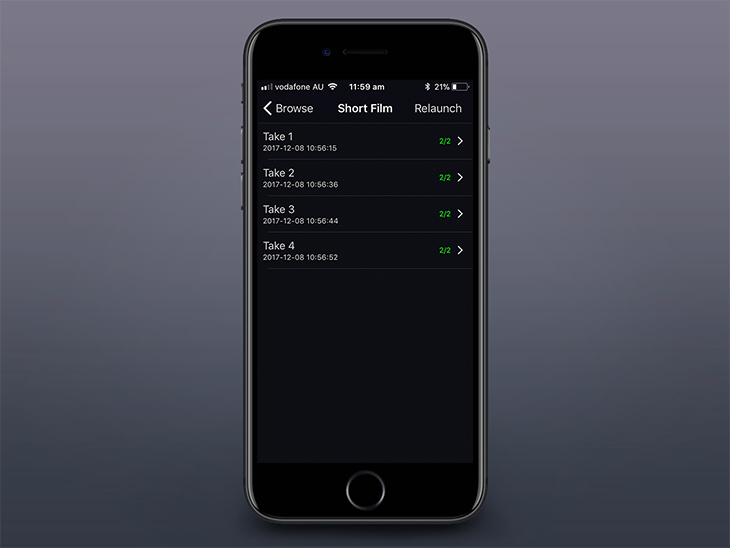
Select a session to view its contents. If you want to create more recordings within that file directory, press the relaunch button towards the top right of the screen.
Upgrade AirLinc
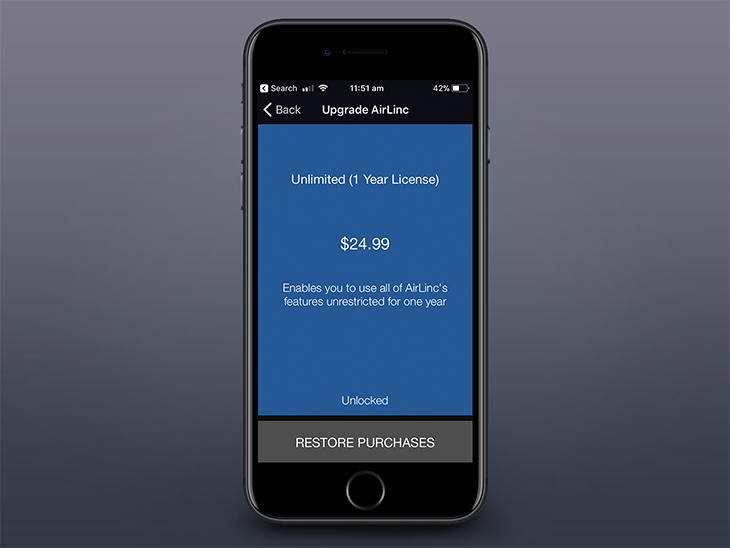
Select ‘Upgrade’ from the main menu, here you can choose to purchase a licence to use the full version of AirLinc. This will remove the recording limit and audio watermark and help us make improvements to AirLinc. The licence is active for one year at which point it can be manually renewed.
You only need one paid up device in your session for all limitations to be removed. If you have purchased Airlinc within the last year and are installing on a new device, press the ‘Restore Purchases’ button to apply your licence to the new device.